|
||||||||||
|
CMHS Home
War of 1812
Activities 
|
Overview|
Shirt|
Trousers|
Shoes|
Neck Stocks|
Shako|
Forage Caps|
Canteen|
Haversacks|
Shoulder Belts|
Cartridge Box|
Barracks Jacket|
Regimental Coat|
Recruit Requirements|
Suppliers
The uniform of a Soldier of a Battalion Company, 49th Regiment of Foot: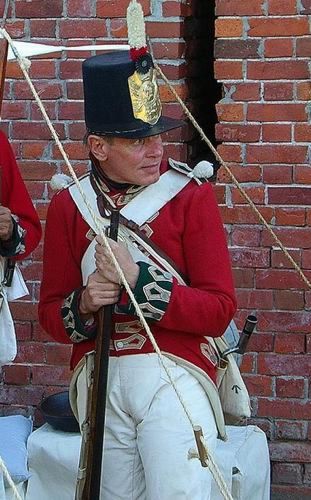
The private is from a battalion company within the regiment. You can see this by the white over red tuff on the front top of his lacquered felt 7 inch high "stovepipe" shako. The shako plate is of standard British Infantry issue. His shoulder straps end with a worsted wool tuff and the false pockets at the side of the coatee are horizontal. He wears the standard issued buff, leather crossbelts. One belt holds the scabbard and bayont (over the right shoulder) and the other the black, leather cartridge box (over the left shoulder). His trousers are made of sail cloth, as ordered by Brock before the outbreak of the war. Black, wool gaitors cover his leather boots to help keep dirt and pebbles out. His weapon is an India Pattern (or 3rd pattern) Brown Bess. 
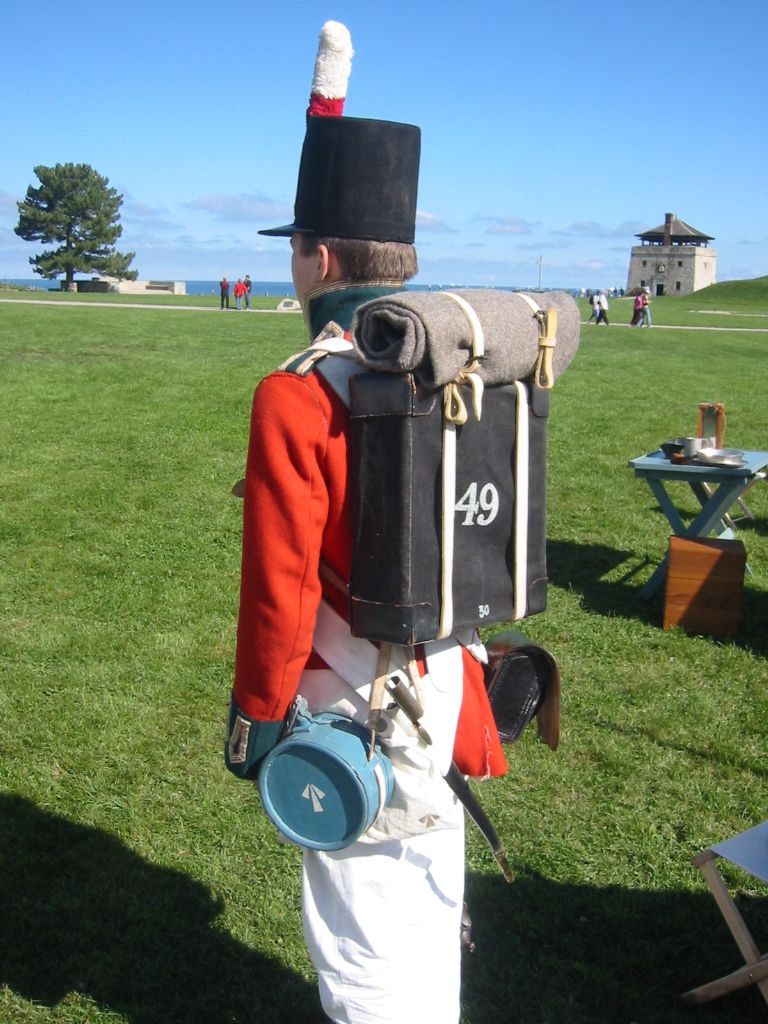
Rear Right ViewHere you can see the cartridge box and the back of his back pack. Most units had the number or design to represents the regiment. Rear Left ViewYou can see that the private carries his bayonet on the left side for easy access and his wooden canteen. A white canvas haversack is carried on his left side. The haversack would hold his daily rations of food and sometimes personal items like a pipe and tobacco. The arrow on the haversack and the canteen was a mark of the Board of Ordanace. This met it was acquired and issued by the British Army. 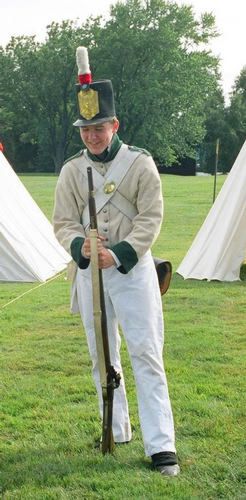
Drill / Barracks DressThis uniform was worn while performing drill. It was also worn, minus the shako and crossbelts, when on a work party or forging. He would also wear this outfit while in barracks off duty. 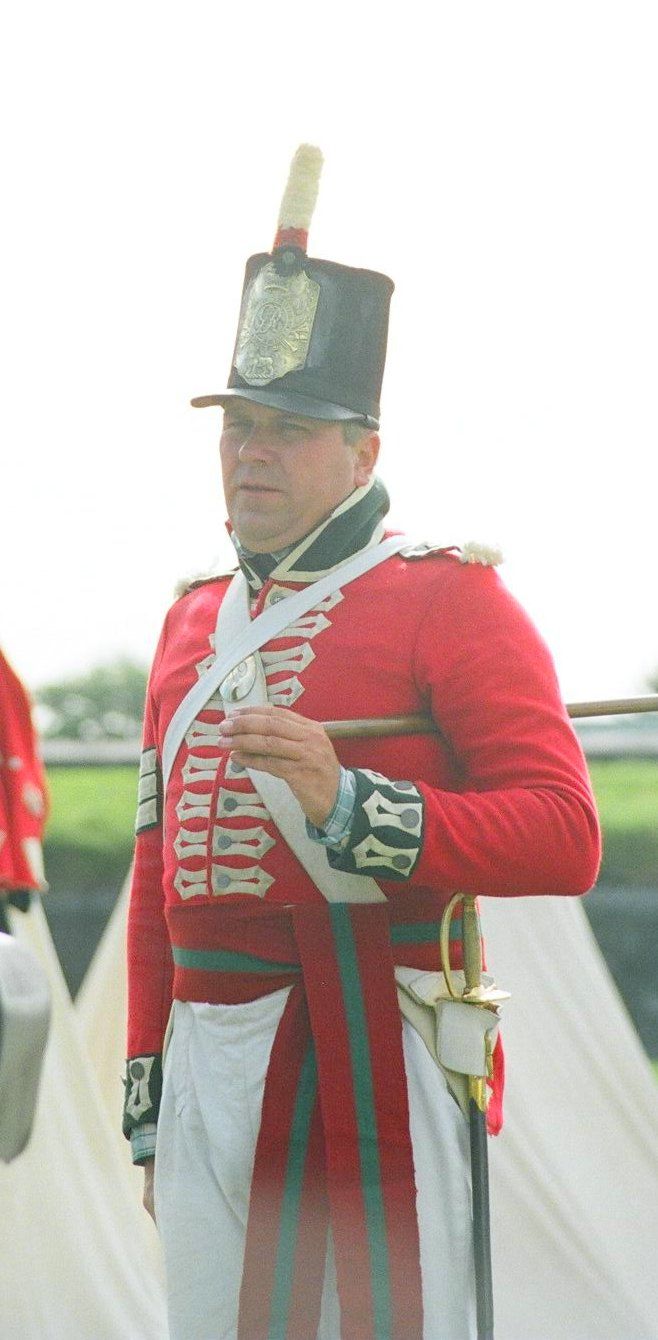
Sergeant, Battalion Company, 49th FootA few Sergeants would be assigned to each company within the regiment. He was responsible for the men in the company during drill, work parties and off course, on the battlefield. He wears a similar uniform as the privates and NCOs. Except, he wears a crimson sash with the regiments facing colour in the centre. Also, his lace does not have any regimental "worm" or stitiching within it. He carries a cane as a symbol of his authority on the parade ground and to assist in drill instruction. He wears a standard issued NCO infantry sword on his left side. His rank insignia is on the right upper sleeve only. If he was a Sergeant with a light company, he would have it on both sleeves. The sergeant is identified by three chevrons. 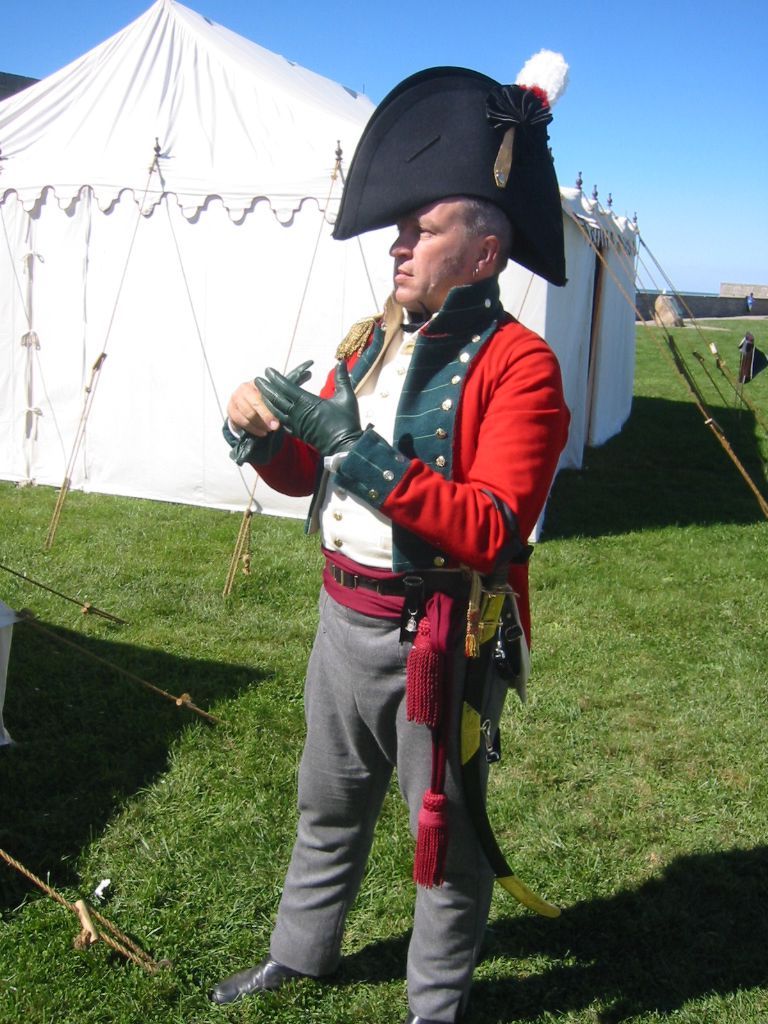
Captain, Battalion Company, 49th FootThis is an officer of a battalion company within the regiment. The officer wears a plain coatee with a short tail as this was common by this time. No lace is found on the coatee as it is a field dress uniform. His formal uniform would've had gold embroidered stiching wear the common soldiers lace would be. His jacket is double breasted and can be worn open, as shown, or closed across his chest. On his headdress you can see the white over red feather plum indicating he is from a battalion company. He wears a crimson sash around his waist, a symbol of a commission officer. On his right shoulder is a gold epaulet which indicates he is a Lieutenant or Captain. Major and above wore two, one on each shoulder. Behind this officer, you can see a marquis tent. Here is where one officer could be found while in camp. 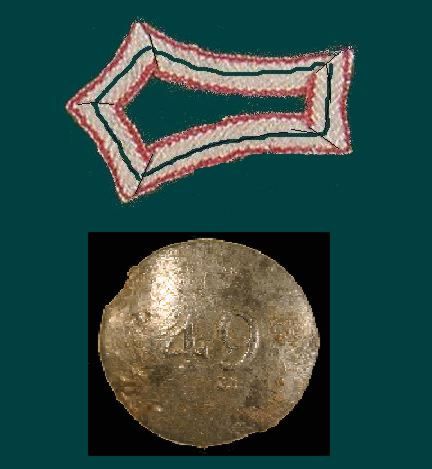
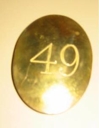
Regimental Lace & ButtonThis is an example of the 49th Regimental lace. The green wool facing has faded over the years. The 'worm' or stitching is red on the inner and outer sides of the lace with a single green in the middle. The lace is shaped in a 'bastion' loop. The enlistment men (private, L/Cpl and Corporal) would wear this lace down the front around the buttons, on the cuffs, the false pockets, and trim around the collar and shoulder straps. Each regiment in the British Army would have different colours and one of 4 different types of lace patterns. This would help identify the regiment the soldier belonged to. The button is simply made of pewter with the number 49 at the centre. Two sizes of buttons. Small size worn as functional buttons to close the coatee and on the shoulder straps. Larger buttons were used on the cuffs, false pockets at the side of the coatee and the triangular device located at the back.
Overview|
Shirt|
Trousers|
Shoes|
Neck Stocks|
Shako|
Forage Caps|
Canteen|
Haversacks|
Shoulder Belts|
Cartridge Box|
Barracks Jacket|
Regimental Coat|
Recruit Requirements|
Suppliers
Clothing of a Private SoldierShirt
Patterns
Trousers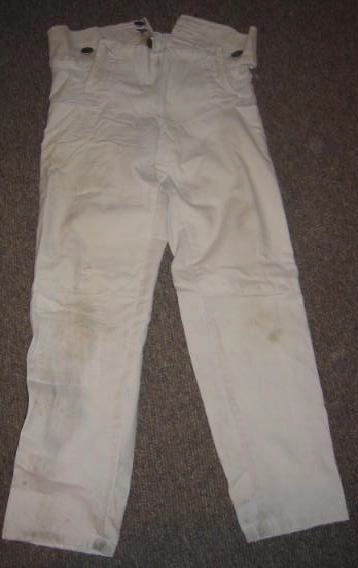
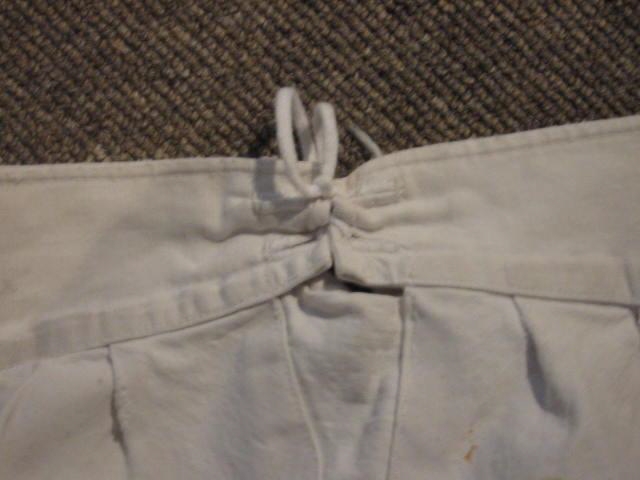
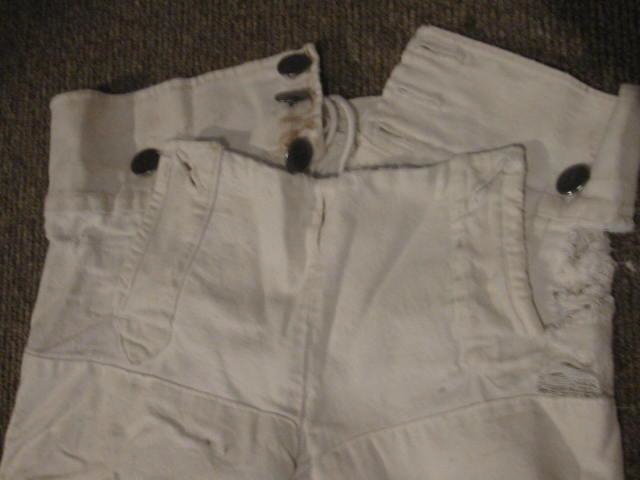
Made of a canvas or heavy linen. Gen. Brock ordered the 49th Regt to have trousers produced made of sail cloth. Natural white in colour. Drop front with 3 buttons to the close the waistband and two buttons to hold up the front. A gusset in the back of the waistband used to adjust waist and simply tied to fasten. Patterns
Shoes
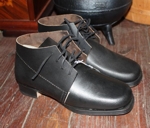
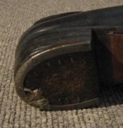
Black leather, rough surface to finish with leather lacing (not buckles). Leather sole with hob nails to protect the wearing and tear of the soles. Heel should have a small heel plate “horseshoe” attached. Gaitors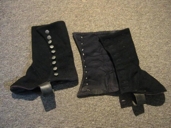
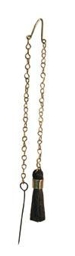
This covers your boot up past the ankle. It helps prevent stones, etc from getting into the boot. It is made of black wool with 7 pewter buttons on each (on the outside of the gaitor for fastening). It has a leather strap that runs underneath the boot. Neck Stock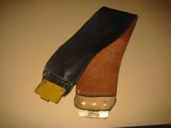
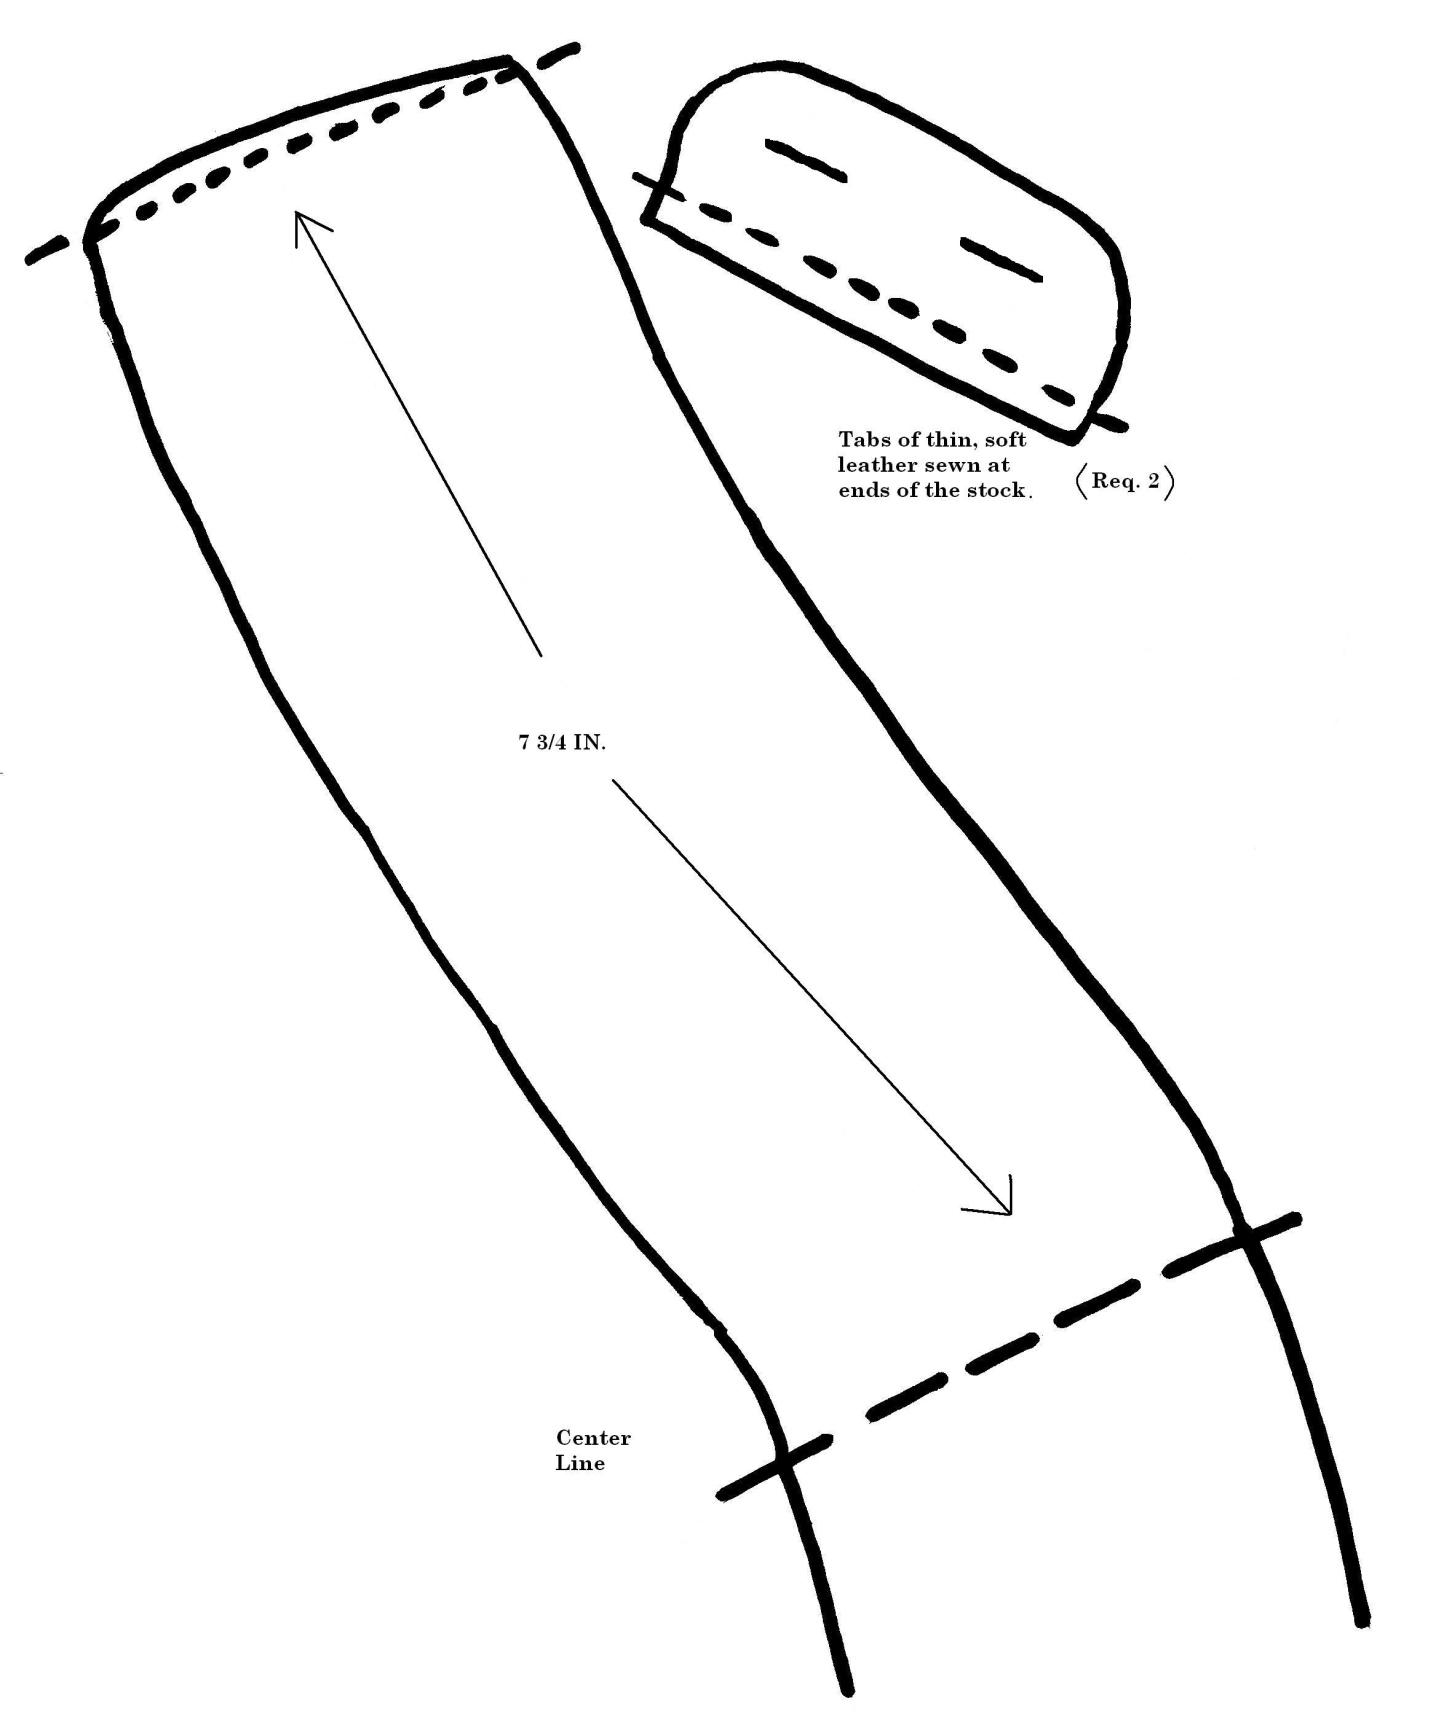
This is a full size pattern that you can use to make your own neck stock. Use a stiff piece of leather, dyed black (use a thickness that will not cause you to cringe every time you put it on). Each side, from the centre, is 7 ¾ inches long (total length 15 ½ in. long). This is based on a 17in neck. Just trim it shorter a little at a time to fit comfortable to your neck. Make two tabs using soft leather, black and sew it on to each end of the stock. Cut three tab holes as indicated to fit the brass stock clasp.
Overview|
Shirt|
Trousers|
Shoes|
Neck Stocks|
Shako|
Forage Caps|
Canteen|
Haversacks|
Shoulder Belts|
Cartridge Box|
Barracks Jacket|
Regimental Coat|
Recruit Requirements|
Suppliers
British Stovepipe Shako
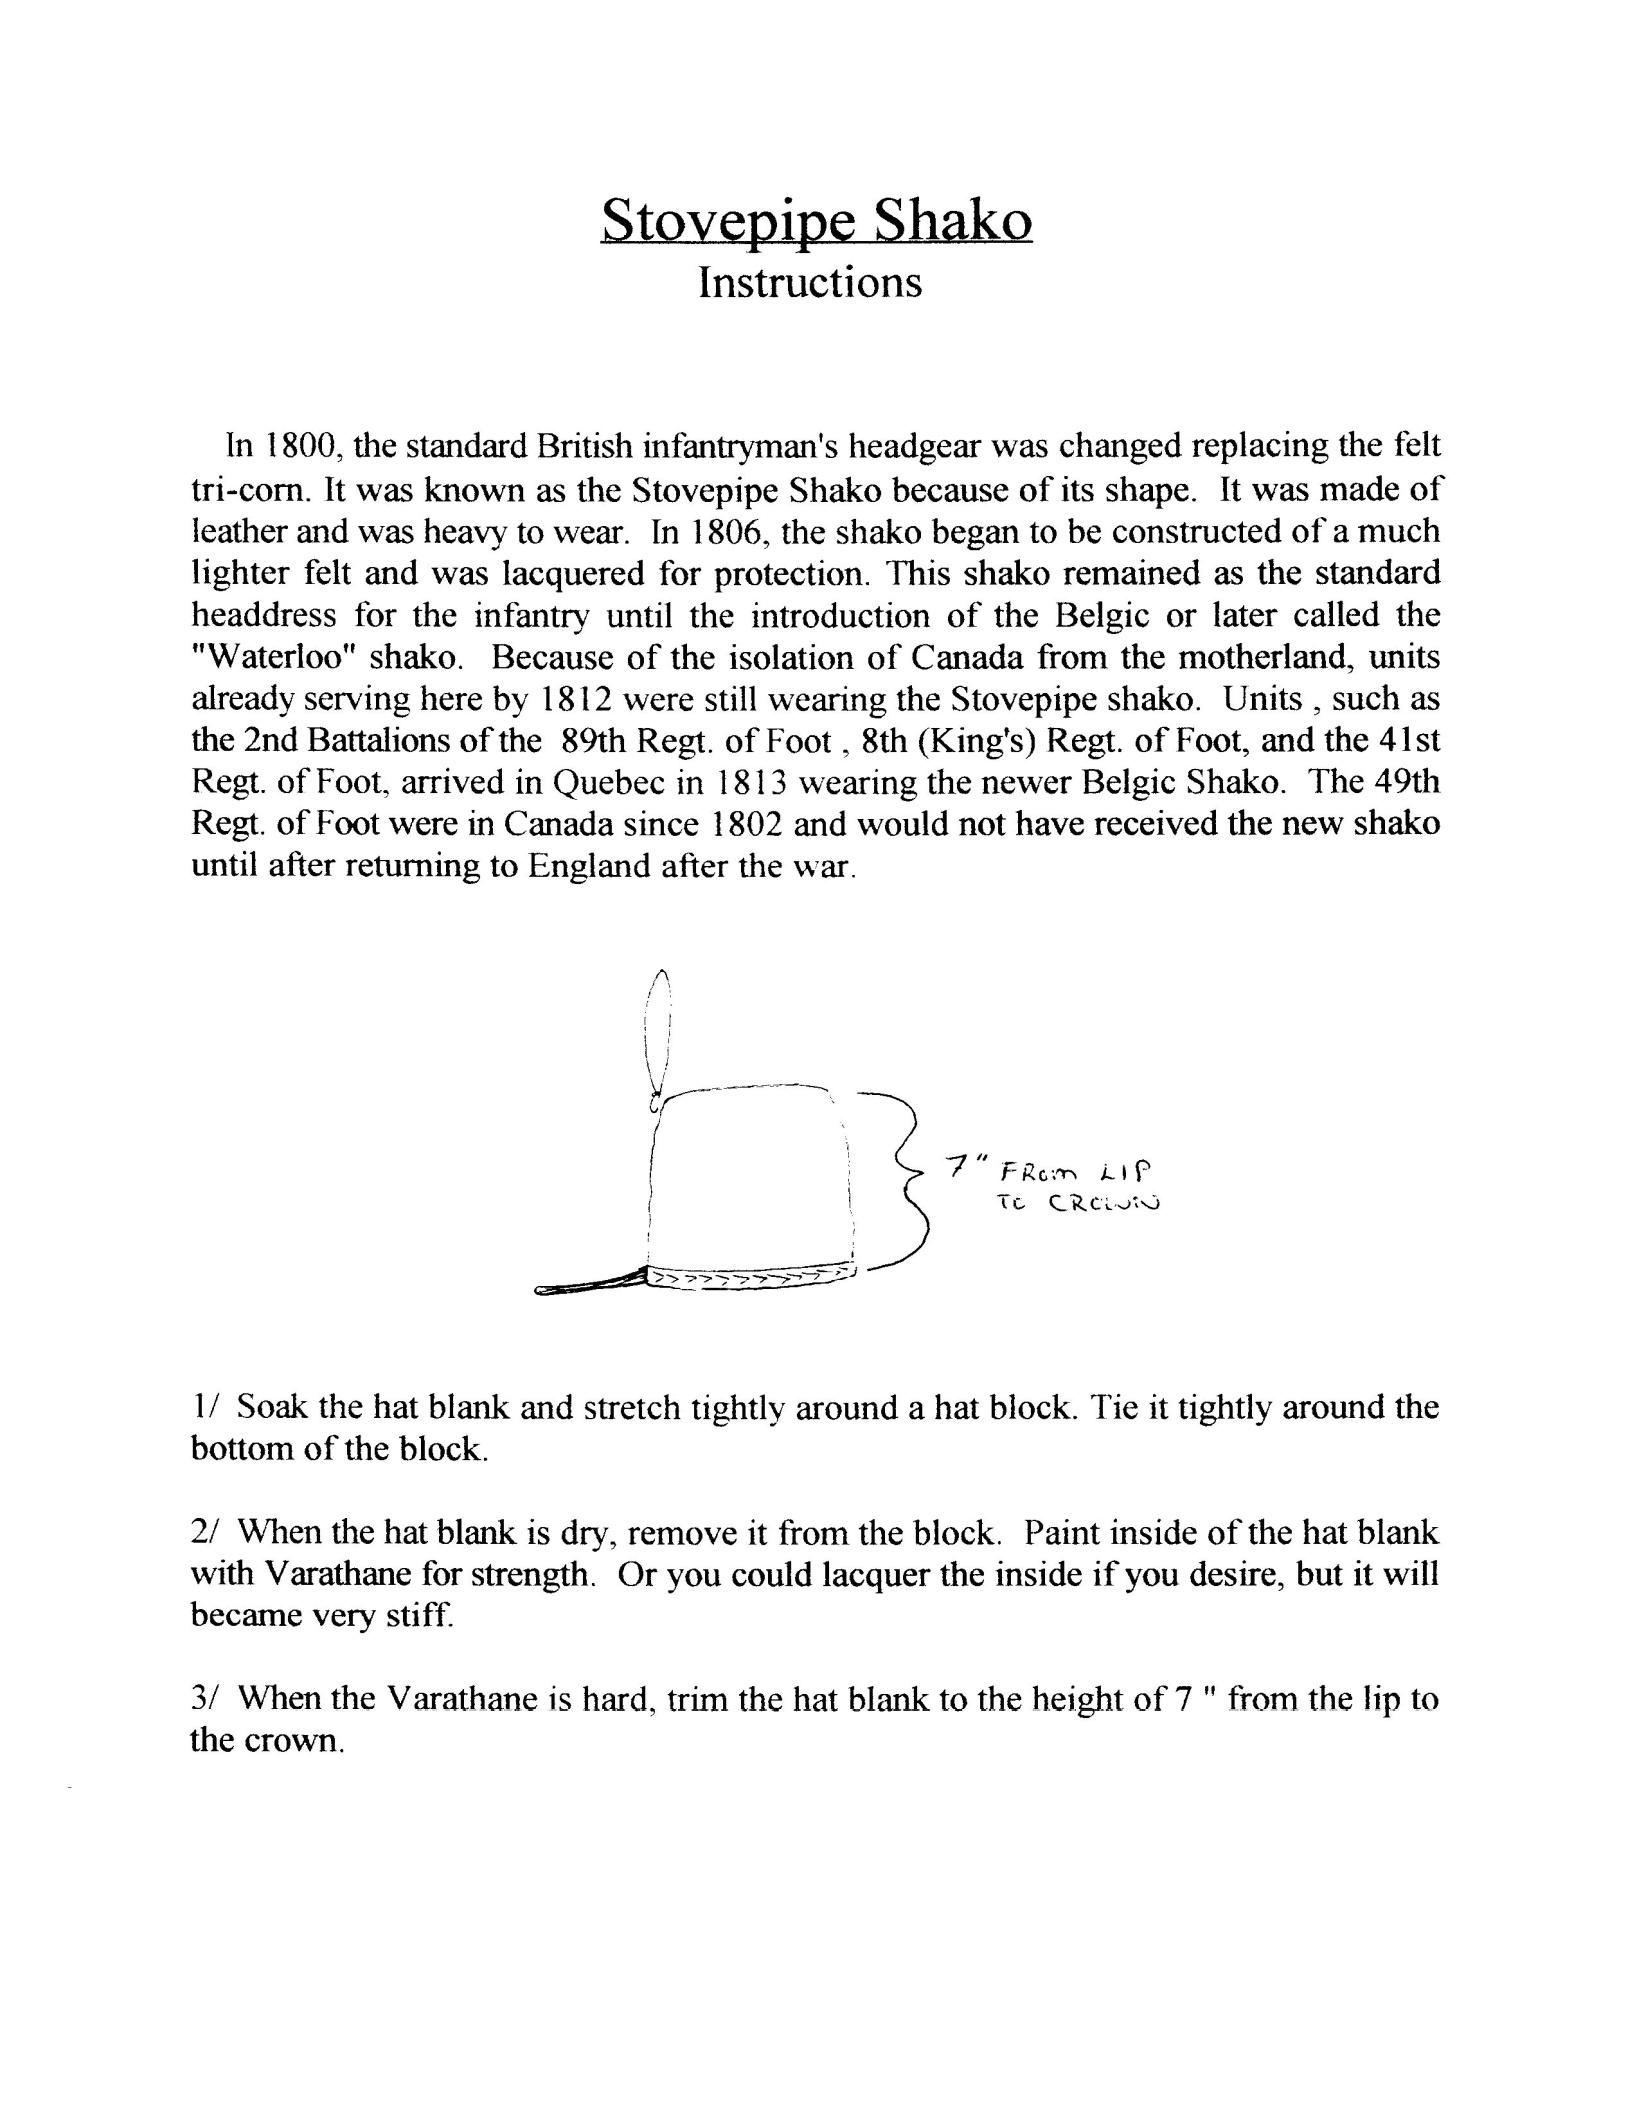
Named for it's distinct shape, this was the British Infantry's headgear from 1806 until 1812. Troops arriving in North America from europe in 1813 would have been issued the newer Belgique Shako, but the 49th would not receive them until returning to England. Instructions for making a shako from a blank are available below. 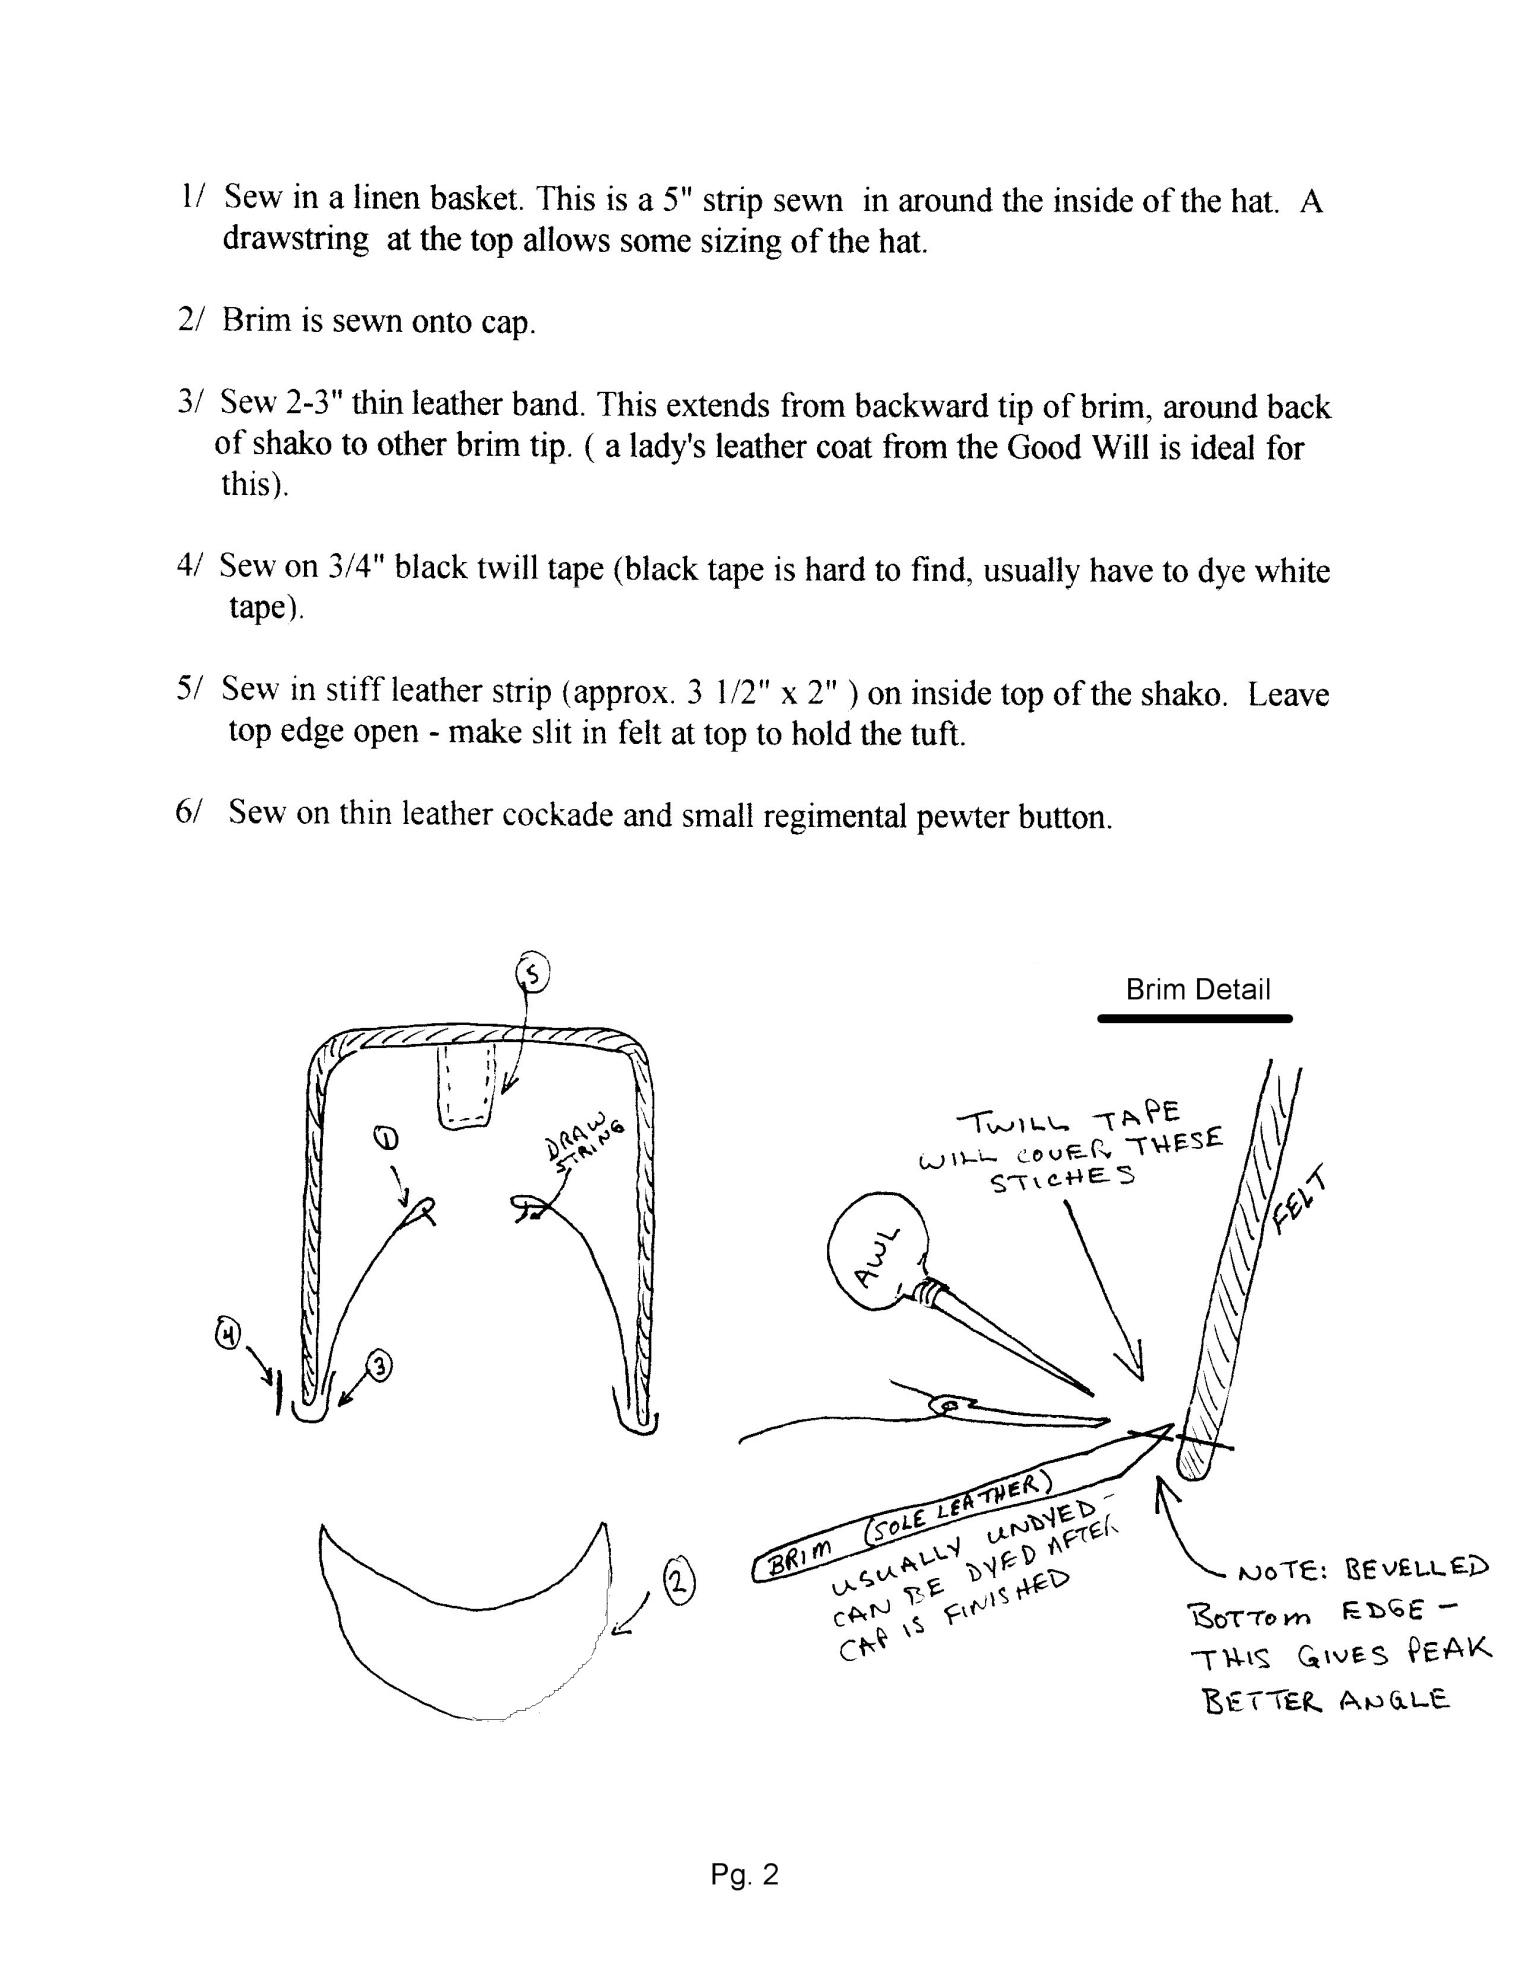
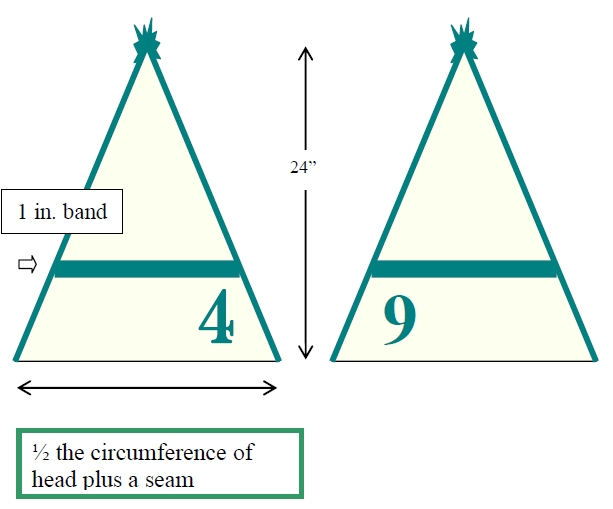
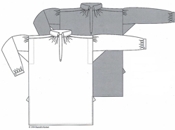
Forage Caps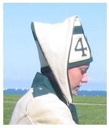
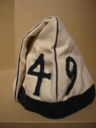
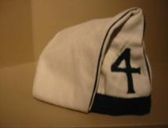
We still do know a lot about the 49th cap but originals for the 33rd and other British infantry units are found in museums overseas. The forage or fatigue cap is basically a triangle that is sewn from two sections of white wool broadcloth and is piped with the facing color of the regiment. The piping is simply a strip of wool that is sewn into the seam and the excess is cut flush with the seam of the cap body. This gives a nice outline of the triangle. Often a tuft of wool yarn is sewn to the tip. The Regimental number is cut from the facing color and sewn to the front of the cap. These numbers “49” are the Arabic style and not Roman numeral. A one inch green tape or strip of wool is sewn above the numbers. This is where the cap is folded. It is logical that these caps were lined with cotton linen for comfort and sweat. These caps a very easy to make and do not require a lot of material. They were probably made from the scraps left over from making barracks coatees. The size really depends on the size of the head. Here is a rough sketch.
British Army Wooden Canteen 1793-1861
The wooden canteen was first officially sanctioned in 1793. Trotter and Sons, the main manufacturer, were recorded making over 200,000 of them by 1803. That said there was still a mixture of tin and wooden canteens available to the troops throughout the Napoleonic Wars as shown in military store records. Each wooden canteen came with a 68 inch long, 1 inch wide leather strap with buckle for adjustment. The strap was mounted through the canteen's iron bails.
Overview|
Shirt|
Trousers|
Shoes|
Neck Stocks|
Shako|
Forage Caps|
Canteen|
Haversacks|
Shoulder Belts|
Cartridge Box|
Barracks Jacket|
Regimental Coat|
Recruit Requirements|
Suppliers
Haversacks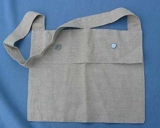
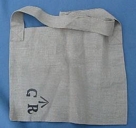
The haversack used during the Seven Years War somewhat larger than this design and had an adjustable strap and a three button closure. Likely as an attempt to reduce costs and lighten the load the soldier bore, a smaller version was introduced, likely in the late 1760s, with a non-adjustable strap and a two button closure.
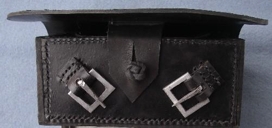
Shoulder Belts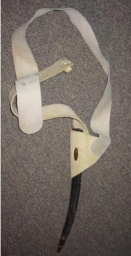
The 1802 regulations called for the shoulder belts of the infantry to be 2 1/8 inches (5.4 cm) wide. They were to be constructed of buff leather and were to be coloured white, except for regiments with buff coloured facings; these regiments were to have buff coloured belts as well. Also, the 1802 regulations called for two 'D' shaped rings to be sewn to the inside of the bayonet carriage. These rings were the means by which a magazine could be added to the equipment. This magazine was to be worn only when on active service or when on foreign station. The magazine was a tin box which was covered with black leather. It held 24 rounds of ball cartridge which, when added to the 36 rounds in the pouch, brought to 60 the number of rounds carried by each man.
Markings On The BeltsA general order dated January 16th, 1812, and issued from the Horse Guards by the Adjutant General stated: "in order to guard against the losses which have, in various instances, occurred to the Colonel.s of Regiments and to the Public, from the accoutrements and Regimental Appointments not being duly marked. The Commander in Chief commands that every article of either description shall have, conspicuously marked upon it, the number or appellation of the battalion and regiment to which it belongs, as well as the number or letter of the troop or company. The marks are to be carefully and legibly placed on the inside of the belts, pouches and slings¡¦This order is to be carried into effect by every Corps in His Majesty.s Service, with the least possible delay, in whatever country it may be serving at the time of its receipt". British Army Cartridge Box or Pouch 1804 -1817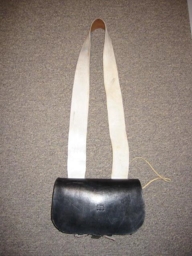
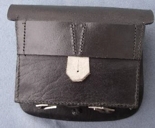
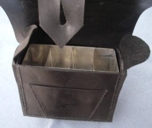
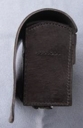
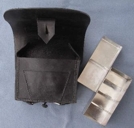
Through detailed studies of Regimental Inspection Returns, it has been uncovered that this pouch, approved in 1804, was almost universally used by British units at home or serving in Europe by 1809-1810. For regiments in the colonies or other stations such as the Cape of Good Hope, it took as late as 1812 to outfit everyone with the new pouch. In the War of 1812, when the new pouches arrived, the regiment's old ones were sent to auction or sold through the newspaper ads, presumably purchased by volunteer units.
Overview|
Shirt|
Trousers|
Shoes|
Neck Stocks|
Shako|
Forage Caps|
Canteen|
Haversacks|
Shoulder Belts|
Cartridge Box|
Barracks Jacket|
Regimental Coat|
Recruit Requirements|
Suppliers
Barracks Jacket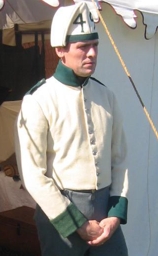
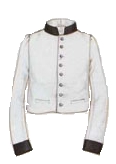
Made of a white wool. The facings (Collar and Cuffs and Shoulder Straps ) are of regimental colour. 49th Foot was a deep green. It is a waist cut. This was worn for drill, fatigue work, off duty. The Regimental Coat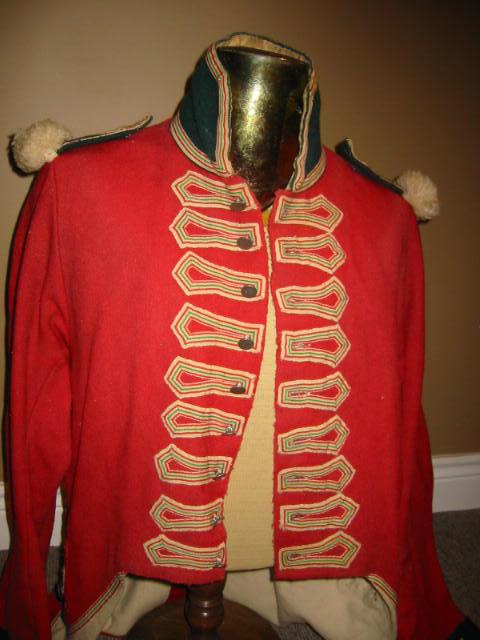
The coat is worn for parades, walking out, inspections, Guard Duties, and of course, battle / campaign. 
Back side – False pockets are horizontal for battalion companies. 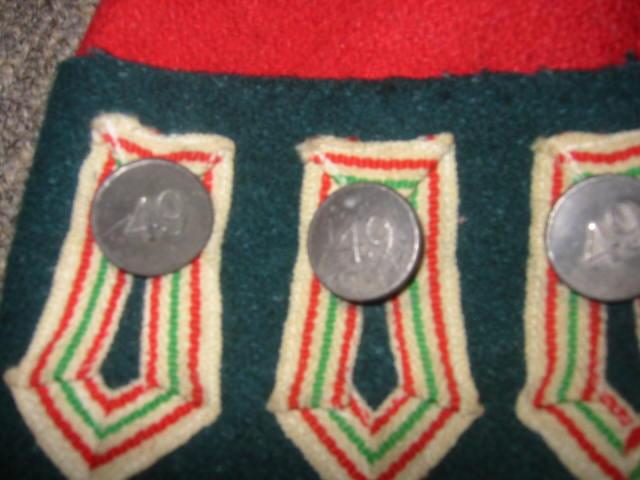
Cuffs – four buttons each with bastion loop lace. Note the regimental lace consist of a Red Green Red worm through it. Lace is made of a worsted wool. 
Collar and shoulder straps – Battalion companies had a white tuft at the ends. Again regimental lace edging – only on privates and corporal coats. New Recruit Uniform RequirementsThe following items are the minimum in order to begin training:
Once new recruit performs the Infantry Safety Test successfully, the following items will be required:
Suppliers of Clothing and Equipment:
|
|||||||||
 Made of cotton or a linen. Tall collar with a button of wood or horn to fasten at the neck, or can be closed with two ties. Gussets under the armpits and button on each cuff to close. They may be purchased or if you know how to sew (or know someone) then it's not hard to get the patterns and make them yourself.
 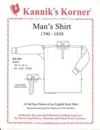 Kaanik's Korner: Man's Shirt (1790-1830) This is the most authentic pattern, but it uses a lot of material, and there is a lot of bulk to tuck into your pants, and tunic sleeves. The pattern instructions are for hand sewing which might be confusing.
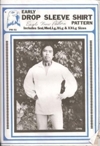 Eagle View: Early Drop Sleeve Shirt This pattern uses less material, and includes good instructions. We recommend a 7-1/2 oz. canvas (shoe canvas) which is available at Fabricland, and online. Buy more than the pattern calls for because you have to wash and bleach it before cutting, and this fabric shrinks. You'll need to overstitch the seam allowances to prevent fraying when you wash the shirt.
 Kaanik's Korner: Man's Trousers, High Waisted (1790-1810) This pattern has pockets which are not necessary. Again, the instructions are for hand sewing so may be confusing.
 Eagle View: Broadfall Drop Front Breeches does not have pockets and the instructions are easier to follow. We recommend 9 oz. canvas, and as with the shirts, buy extra fabric so that it can be wash, bleached, and shrunk before cutting. Remember to overstitch the seam allowances to prevent fraying.