|
|||||||||||||||
|
CMHS Home
War of 1812
Activities 


|
The 3rd Model Brown Bess Musket
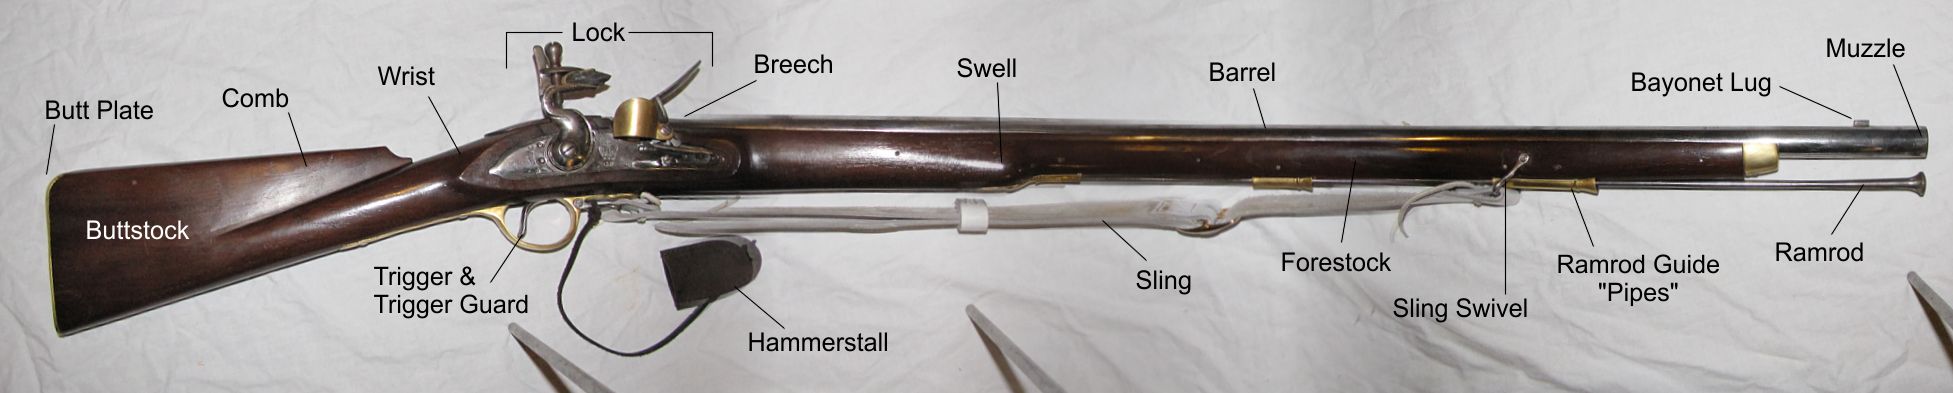
This lighter and shorter (39-inch barrel) musket became the preferred musket of manufacture by the Board of Ordinance for the British Army in 1797. Prior to this, this pattern was developed and adopted by the armies of the East India Company, hence the name. Throughout the Napoleonic Wars nearly 3 million of these Brown Bess muskets were manufactured and distributed to Britain's infantry regiments. The only change in their manufacture during this period was the switch from a swan-necked cock to a reinforced style in 1809. This 3rd Model Brown Bess offered here was the more common swan-necked style. Aside from being a pound lighter and 3 inches shorter in the barrel, the main difference from the previous "Short Land" pattern and the India pattern were ones of style (removal of the thumb plate and only three pipes for the ramrod instead of four). Because of the numbers manufactured, this pattern saw use as late as 1850 in the British army and militia. Musket's EffectivenessThe theoretical effectiveness under IDEAL conditions of a musket fired at a target the size of a man.
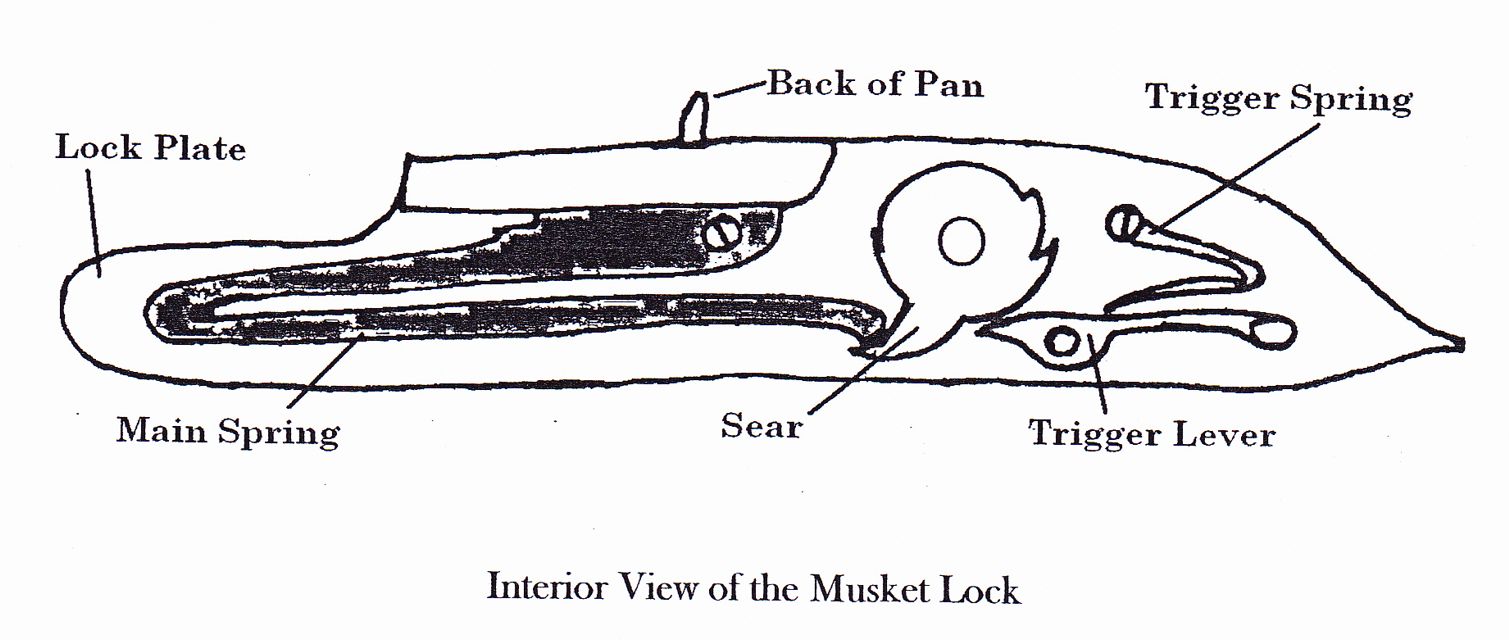
Anatomy of a Lock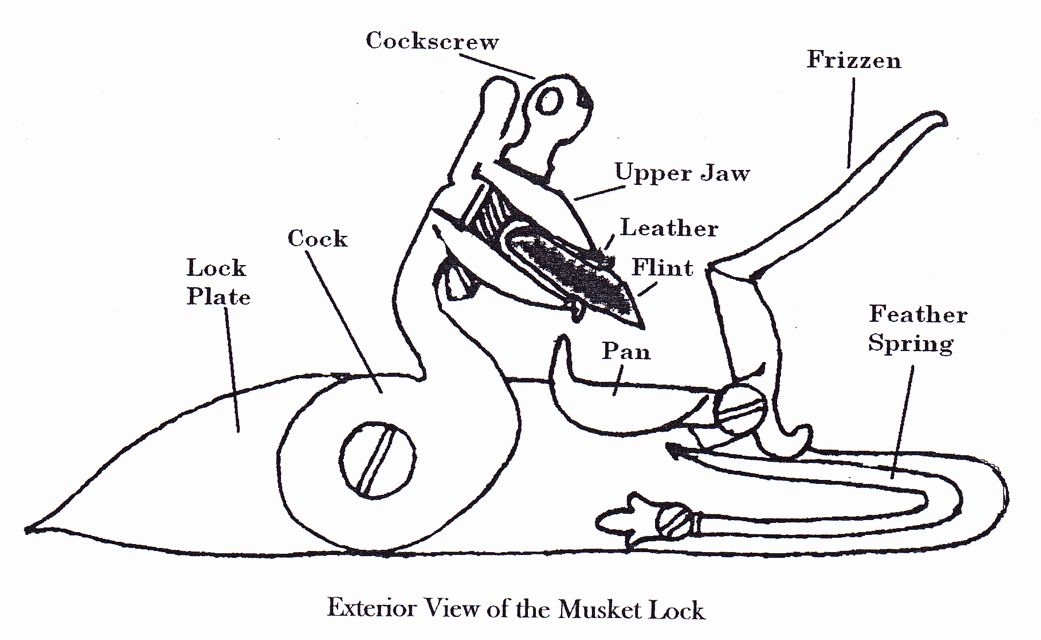
Note: The lock is in the Full Fired position. This is the position used when unloaded and when NOT in use. This position will relieve tension on the springs. 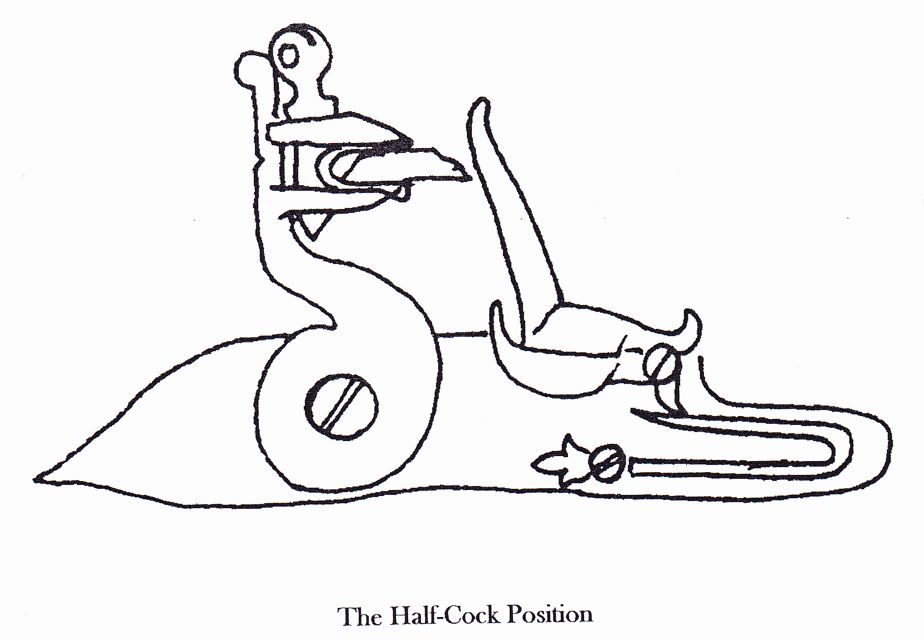
Half-Cock PositionNote: This is the position the musket lock will be in when in formation and after loading. It is, for lack of a better term, your safety after loading the musket. 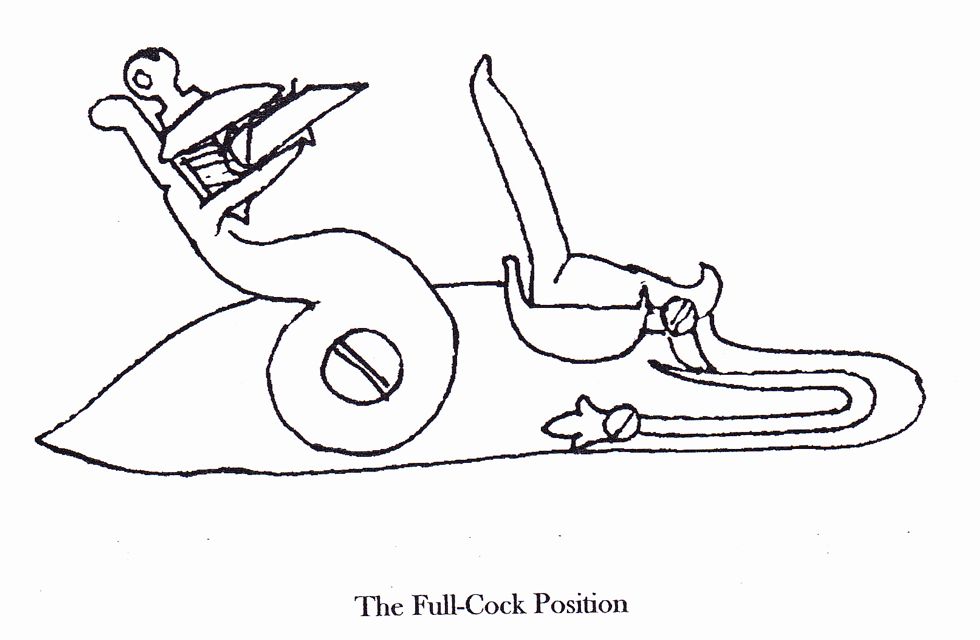
Full-Cock PositionNote: This position will only be used when given the command to Make Ready, just prior to firing the musket. It is dangerous, when loaded, to have the musket in this position. Interaction of the Tumbler and SearThe Tumbler (A) and the Sear (B) in the Fired, Half-Cock, and Full-Cock positions are illustrated below. 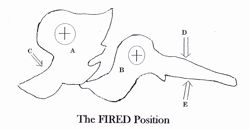
The Fired PositionThe forces applied by the Mainspring(C), the Sear spring(D), and the Trigger(E)are indicated here by the arrows. The above position is when the least amount of tension is applied by the springs. 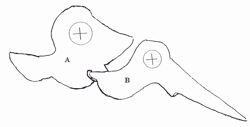
The Half-Cock PositionThe reason for the half-cock being one of safety is clearly illustrated here. The Sear(B) is well seated in the notch of the Tumbler(A). 
The Full-Cock PositionRemember, bring the musket to Full-Cock only when ready to fire, and at no other time. As illustrated here, the Tumbler(A) has only a tentative grasp on the Sear(B), to facilitate a quick release when the trigger is pulled. |
||||||||||||||

